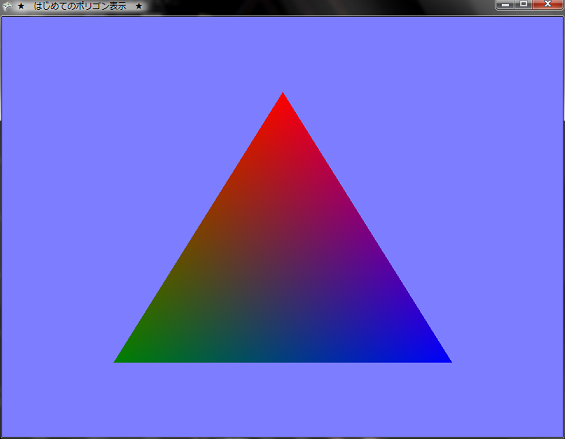
なんか,最初のポリゴン表示といえば,三角形で頂点カラーを使って描画している例が多いので,それにならってみました。

はじめてのポリゴン表示★ 1.はじめに
今回はモデルファイルを使わずにプログラムで頂点データを定義し描画するやり方のひとつをやってみました。
なんか,最初のポリゴン表示といえば,三角形で頂点カラーを使って描画している例が多いので,それにならってみました。
★ 2.ポリゴンの表示
基本的にはDirectXと同じような感じですね。
まずは,頂点データを定義して,各頂点ごとに座標とかの設定をしていきます。XNAでは背面カリングのデフォルト設定が反時計まわりになっているので,時計まわりが表と認識されるようです。ですので,頂点のデータは時計回りに設定しましょう。 最初に,色々と使う変数をprivateとして定義しておきます。 00022: // 行列関係 00023: Matrix projection; 00024: Matrix view; 00025: Matrix world; 00026: 00027: // カメラ関係 00028: Vector3 cameraPosition = new Vector3(0.0f, 0.0f, 3.0f); 00029: Vector3 cameraTarget = Vector3.Zero; 00030: Vector3 cameraUpVector = Vector3.Up; 00031: 00032: // 頂点データ関係 00033: VertexPositionColor[] vertices = null; 00034: VertexDeclaration vertexDeclaration = null; 00035: 00036: // エフェクト 00037: BasicEffect effect = null; 00038: 00039: // 背景色 00040: Color bgColor = new Color(125, 125, 255, 255); 00041: 頂点データを定義するのにVertexPositionColor型を使います。他にもVertexPositionColorTexture型とか,VertexPositionNormalTexture型とか,VertexPositionTexture型とかがあるようですが,今回は使いません。 頂点データの設定はInitializeVertices()メソッドで次のように行います。
00079:          /// <summary>
00080:          /// 頂点の初期化
00081:          /// </summary>
00082:          private void InitializeVertices()
00083:          {
00084:              vertices = new VertexPositionColor[3];
00085:
00086:              // 時計回りに頂点を定義する (デフォルトでは反時計まわりのものがカリングされるため)
00087:              vertices[0] = new VertexPositionColor(new Vector3(0.0f, 0.8f, 0.0f), Color.Red);
00088:              vertices[1] = new VertexPositionColor(new Vector3(1.0f, -0.8f, 0.0f), Color.Blue);
00089:              vertices[2] = new VertexPositionColor(new Vector3(-1.0f, -0.8f, 0.0f), Color.Green);
00090:          }
00091:
このInitializeVertices()メソッドはLoadContent()メソッド内で呼び出すようにしておきます。 LoadContent()メソッド内ではBasicEffectの作成も行っています。XNAが提供するBasicEffectを使えばエフェクトファイル(*.fx)をエフェクトファイルを作成する手間が少し省けるようです
00092:          /// <summary>
00093:          /// LoadContent will be called once per game and is the place to load
00094:          /// all of your content.
00095:          /// </summary>
00096:          protected override void LoadContent()
00097:          {
00098:              // Create a new SpriteBatch, which can be used to draw textures.
00099:              spriteBatch = new SpriteBatch(GraphicsDevice);
00100:
00101:              // TODO: use this.Content to load your game content here
00102:
00103:              // 頂点データの定義
00104:              vertexDeclaration = new VertexDeclaration(graphics.GraphicsDevice,
00105:                 VertexPositionColor.VertexElements);
00106:
00107:              // エフェクトを作成
00108:              effect = new BasicEffect(graphics.GraphicsDevice, null);
00109:
00110:              // カメラの初期化
00111:              InitializeCamera();
00112:
00113:              // 頂点データの初期化
00114:              InitializeVertices();
00115:
00116:          }
00117:
あとは,Draw()メソッド内での実際の描画処理ですが,graphics.GraphicsDevice.VertexDeclarationに自分で設定した頂点データの定義であるvertexDeclarationという変数を代入して,頂点データの定義を設定します。あとは,ワールド行列とか射影行列などをエフェクトのほうに送ってやって,foreach文内でgraphics.GraphicsDevice.DrawUserPrimitives()メソッドを呼び出してプリミティブの描画を行います。このメソッドの第一引数は描画するプリミティブのタイプを指定します。今回は三角形を描画するのでPrimitiveType.TriangleListを指定します。第二引数は実際の頂点データです。このプログラムはではverticesがそれに当たります。第三引数は頂点データのオフセットです。vertices[0]から描画を開始するので0を指定しておきます。第四引数は描画するプリミティブの数を指定します。今回は1ですが,後々のことを考えて,vertices.Length/3で要素数を算出するように指定してみました。
00143:          /// <summary>
00144:          /// This is called when the game should draw itself.
00145:          /// </summary>
00146:          /// <param name="gameTime">Provides a snapshot of timing values.</param>
00147:          protected override void Draw(GameTime gameTime)
00148:          {
00149:              graphics.GraphicsDevice.Clear(bgColor);
00150:
00151:              // TODO: Add your drawing code here
00152:
00153:              // 頂点データの定義を設定
00154:              graphics.GraphicsDevice.VertexDeclaration = vertexDeclaration;
00155:
00156:              // 単位行列化
00157:              world = Matrix.Identity;
00158:
00159:              // エフェクトに行列を渡す
00160:              effect.World = world;
00161:              effect.Projection = projection;
00162:              effect.View = view;
00163:
00164:              // 頂点カラー有効化
00165:              effect.VertexColorEnabled = true;
00166:
00167:              // エフェクト開始
00168:              effect.Begin();
00169:
00170:              foreach (EffectPass pass in effect.CurrentTechnique.Passes)
00171:              {
00172:                  // パスの開始
00173:                  pass.Begin();
00174:
00175:                  // プリミティブの描画
00176:                  graphics.GraphicsDevice.DrawUserPrimitives(PrimitiveType.TriangleList, vertices, 0, vertices.Length / 3);
00177:
00178:                  // パスの終了
00179:                  pass.End();
00180:              }
00181:
00182:              // エフェクト終了
00183:              effect.End();
00184:
00185:              base.Draw(gameTime);
00186:          }
00187:      }
00188:  }
まぁ,大体流れはDirectXとほぼ同じようですね。とりあえず,ポリゴンの描画はこんな感じでやるみたいです。 ★ 3.頂点バッファ
頂点バッファは,頂点の座標や色を格納した頂点データを初期段階で1つのオブジェクトにまとめておき,レンダリングのときに頂点バッファオブジェクトを1回呼び出すだけで描画できる仕組みだそうです。頂点バッファのデータはメモリが許す限りビデオメモリに格納され,描画のときにはAGPバスを通さないで済むように作られていて,高速に処理されるようになっていんだそうです。
DirectXだとたいてい描画には頂点バッファを使います。XNAでも頂点バッファが使えるようなので,使ってみましょう。 ただし,今回は三角形描くだけなんで,あまり効果は実感しづらいと思いますが,ポリゴン数が多くなれば,その効果がわかると思います。 上にあるソースコードと流れは同じです。まずprivateの変数としてVertexBuffer型のvertexBufferという変数を用意します。 00032: // 頂点バッファ 00033: VertexBuffer vertexBuffer = null; 00034:次に,InitializeVertices()メソッドを次のように書き換えます。
00075:          /// <summary>
00076:          /// 頂点の初期化
00077:          /// </summary>
00078:          void InitializeVertices()
00079:          {
00080:              // 頂点数
00081:              int numVertex = 3;
00082:
00083:              // 頂点バッファを作成
00084:              vertexBuffer = new VertexBuffer(graphics.GraphicsDevice, VertexPositionColor.SizeInBytes * numVertex, BufferUsage.None);
00085:
00086:              // 頂点データの設定
00087:              VertexPositionColor[] vert = new VertexPositionColor[numVertex];
00088:              vert[0] = new VertexPositionColor(new Vector3(0.0f, 0.8f, 0.0f), Color.Cyan);
00089:              vert[1] = new VertexPositionColor(new Vector3(1.0f, -0.8f, 0.0f), Color.Magenta);
00090:              vert[2] = new VertexPositionColor(new Vector3(-1.0f, -0.8f, 0.0f), Color.Yellow);
00091:
00092:              // 頂点バッファにデータをセット
00093:              vertexBuffer.SetData<VertexPositionColor>(vert);
00094:          }
頂点バッファの作成とバッファにデータをセットするという処理が入るだけで,頂点データの設定の仕方は同じです。あとは,Draw()メソッドの内容も変更します。
00142:          /// <summary>
00143:          /// This is called when the game should draw itself.
00144:          /// </summary>
00145:          /// <param name="gameTime">Provides a snapshot of timing values.</param>
00146:          protected override void Draw(GameTime gameTime)
00147:          {
00148:              graphics.GraphicsDevice.Clear(bgColor);
00149:
00150:              // TODO: Add your drawing code here
00151:
00152:              // 頂点データ定義の設定
00153:              graphics.GraphicsDevice.VertexDeclaration = new VertexDeclaration(graphics.GraphicsDevice, VertexPositionColor.VertexElements);
00154:
00155:              // 頂点カラー有効化
00156:              effect.VertexColorEnabled = true;
00157:
00158:              // 行列を単位化
00159:              world = Matrix.Identity;
00160:
00161:              // エフェクトに行列を送る
00162:              effect.Projection = projection;
00163:              effect.View = view;
00164:              effect.World = world;
00165:
00166:              // 頂点バッファをセット
00167:              graphics.GraphicsDevice.Vertices[0].SetSource(vertexBuffer, 0, VertexPositionColor.SizeInBytes);
00168:
00169:              // 描画
00170:              effect.Begin();
00171:              foreach (EffectPass pass in effect.CurrentTechnique.Passes)
00172:              {
00173:                  pass.Begin();
00174:                  graphics.GraphicsDevice.DrawPrimitives(PrimitiveType.TriangleList, 0, 1);
00175:                  pass.End();
00176:              }
00177:              effect.End();
00178:
00179:              base.Draw(gameTime);
00180:          }
00181:      }
00182:  }
Draw()メソッドでは, 頂点バッファをセットするというSetSource()メソッドによる処理が入ります。このメソッドの第一引数は頂点バッファのデータ基で,第二引数は開始オフセット,第三引数は頂点バッファの要素のサイズをバイト単位で指定します。 プリミティブを描画するときは先ほどはDrawUserPrimitives()メソッドを使用したのですが,頂点バッファを使用するほうのプログラムではDrawPrimitivies()メソッドを使用します。このメソッドの第一引数はプリミティブのタイプ,第二引数は開始インデックスで,第三引数はプリミティブの数(ポリゴンの数)になるようです。今回は三角形を一枚描くだけなので,引数は左から順にPrimitiveType.TriangleList, 0, 1になります。 ★ Download
本ソースコードおよびプログラムを使用したことによる如何なる損害も製作者は責任を負いません。
本ソースコードおよびプログラムは自己責任でご使用ください。 プログラムの作成にはMicrosoft Visual Studio 2005 SP1 Professional, XNA Game Studio 2.0を用いています。 |