
テクスチャを表示してみる!
★ 1.はじめに
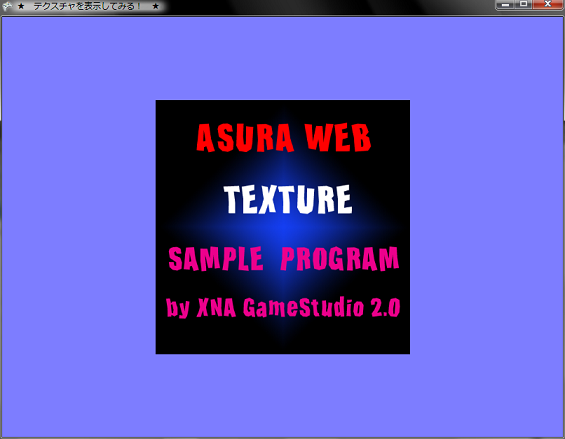
今回はポリゴンにテクスチャを貼り付けてみます。
★ 2.テクスチャマッピング
基本的にはDirectXやOpenGLと全く同じ流れです。
テクスチャを読み込んで,テクスチャマッピングの機能をONにして,テクスチャ座標を指定してポリゴンを描画するといった具合です。
前回と違うのは,テクスチャを格納する変数とテクスチャ座標を指定することぐらいです。
あとは,InitializeVertices()メソッドで頂点の初期化を行います。
今までは頂点カラーを指定して描画するだけだったのでVertexPositionColor型を使っていましたが,今回はテクスチャを張りライティングなどはしないので,法線ベクトルがいらないためVertexPositionTexture型を使います。
コンストラクタの第一引数が頂点座標で,第二引数がテクスチャ座標になります。
あとは,LoadContent()メソッドでテクスチャを読み込む処理を追加します。
描画処理はテクスチャマッピングを有効化にする処理と,使用するテクスチャをセットする処理を追加します。あとはほんとんど同じです。
テクスチャを読み込んで,テクスチャマッピングの機能をONにして,テクスチャ座標を指定してポリゴンを描画するといった具合です。
前回と違うのは,テクスチャを格納する変数とテクスチャ座標を指定することぐらいです。
00032:          // 頂点バッファ
00033:          VertexBuffer vertexBuffer = null;
00034:
00035:          // テクスチャ
00036:          Texture2D sampleTexture = null;
00037:
00038:          // エフェクト
00039:          BasicEffect effect = null;
00040:
2次元テクスチャを使うのでTexture2D型でsampleTextureという変数を用意しておきます。
あとは,InitializeVertices()メソッドで頂点の初期化を行います。
00082:          /// <summary>
00083:          /// 頂点の初期化
00084:          /// </summary>
00085:          void InitializeVertices()
00086:          {
00087:              // 頂点数
00088:              int numVertex = 4;
00089:
00090:              // 頂点バッファを作成
00091:              vertexBuffer = new VertexBuffer(graphics.GraphicsDevice, VertexPositionTexture.SizeInBytes * numVertex, BufferUsage.None);
00092:
00093:              // 頂点データを作成
00094:              VertexPositionTexture[] vert = new VertexPositionTexture[numVertex];
00095:
00096:              // 頂点データを設定
00097:              vert[0] = new VertexPositionTexture(new Vector3(-0.5f, 0.5f, 0.0f), new Vector2(0.0f, 0.0f));
00098:              vert[1] = new VertexPositionTexture(new Vector3(0.5f, 0.5f, 0.0f), new Vector2(1.0f, 0.0f));
00099:              vert[2] = new VertexPositionTexture(new Vector3(-0.5f, -0.5f, 0.0f), new Vector2(0.0f, 1.0f));
00100:              vert[3] = new VertexPositionTexture(new Vector3(0.5f, -0.5f, 0.0f), new Vector2(1.0f, 1.0f));
00101:
00102:              // 頂点バッファに頂点データをセット
00103:              vertexBuffer.SetData<VertexPositionTexture>(vert);
00104:          }
今までは頂点カラーを指定して描画するだけだったのでVertexPositionColor型を使っていましたが,今回はテクスチャを張りライティングなどはしないので,法線ベクトルがいらないためVertexPositionTexture型を使います。
コンストラクタの第一引数が頂点座標で,第二引数がテクスチャ座標になります。
あとは,LoadContent()メソッドでテクスチャを読み込む処理を追加します。
00106:          /// <summary>
00107:          /// LoadContent will be called once per game and is the place to load
00108:          /// all of your content.
00109:          /// </summary>
00110:          protected override void LoadContent()
00111:          {
00112:              // Create a new SpriteBatch, which can be used to draw textures.
00113:              spriteBatch = new SpriteBatch(GraphicsDevice);
00114:
00115:              // TODO: use this.Content to load your game content here
00116:
00117:              // エフェクトを作成
00118:              effect = new BasicEffect(graphics.GraphicsDevice, null);
00119:
00120:              // テクスチャを読み込む
00121:              sampleTexture = Content.Load<Texture2D>("Texture/sample");
00122:
00123:              // カメラの初期化
00124:              InitializeCamera();
00125:
00126:              // 頂点の初期化
00127:              InitializeVertices();
00128:          }
これもややこしい処理はしていないので,問題ないでしょう。描画処理はテクスチャマッピングを有効化にする処理と,使用するテクスチャをセットする処理を追加します。あとはほんとんど同じです。
00155:          /// <summary>
00156:          /// This is called when the game should draw itself.
00157:          /// </summary>
00158:          /// <param name="gameTime">Provides a snapshot of timing values.</param>
00159:          protected override void Draw(GameTime gameTime)
00160:          {
00161:              graphics.GraphicsDevice.Clear(bgColor);
00162:
00163:              // TODO: Add your drawing code here
00164:
00165:              // 頂点データ定義の設定
00166:              graphics.GraphicsDevice.VertexDeclaration = new VertexDeclaration(graphics.GraphicsDevice, VertexPositionTexture.VertexElements);
00167:
00168:              // 頂点バッファをセット
00169:              graphics.GraphicsDevice.Vertices[0].SetSource(vertexBuffer, 0, VertexPositionTexture.SizeInBytes);
00170:
00171:              // テクスチャ有効化
00172:              effect.TextureEnabled = true;
00173:
00174:              // テクスチャをセット
00175:              effect.Texture = sampleTexture;
00176:
00177:              // 行列をセット
00178:              effect.Projection = projection;
00179:              effect.View = view;
00180:              effect.World = world;
00181:
00182:              // 描画処理
00183:              effect.Begin();
00184:              foreach (EffectPass pass in effect.CurrentTechnique.Passes)
00185:              {
00186:                  pass.Begin();
00187:                  graphics.GraphicsDevice.DrawPrimitives(PrimitiveType.TriangleStrip, 0, 2);
00188:                  pass.End();
00189:              }
00190:              effect.End();
00191:
00192:              base.Draw(gameTime);
00193:          }
00194:      }
DirectXやOpenGLを使ったことがあれば,なんてことはないですね。★ Download
本ソースコードおよびプログラムを使用したことによる如何なる損害も製作者は責任を負いません。
本ソースコードおよびプログラムは自己責任でご使用ください。
プログラムの作成にはMicrosoft Visual Studio 2005 SP1 Professional, XNA Game Studio 2.0を用いています。
本ソースコードおよびプログラムは自己責任でご使用ください。
プログラムの作成にはMicrosoft Visual Studio 2005 SP1 Professional, XNA Game Studio 2.0を用いています。